The ESP32 camera is a nice piece of hardware. At only 5 USD on Aliexpress, it is by far the easiest and cheapest way to get your hands on embedded vision.
Sadly, the (many) tutorials you find online are of really poor quality...
They are lengthy, intricate and hard to customize for your specific needs. And since they're almost a copy-past of each other, you run the risk to get used to that style of programming.
But it doesn't have to be like that. There's a better, cleaner, more efficient way to use the ESP32 camera.
Enter the EloquentEsp32Cam Arduino library.
What's inside EloquentEsp32Cam?
A lot of things, actually, but here I'll list some of them:
- camera abstraction
- sensor configuration
- jpeg decoding
- motion detection
- face detection
- Edge Impulse image classification
- Edge Impulse object detection
- telegram notifications
- MQTT notifications
- SD photo storage
- multithreading
But, believe it or not, quantity is not the main selling point of this library. Quality is!
In the following sections, I'll show you a Quickstart of the EloquentEsp32Cam library to let you experience by yourself a better way of interacting with your little ESP32 camera board.
Hardware requirements
An ESP32 board with a camera.
Software requirements
EloquentEsp32Cam >= 2.2 (install from Arduino Library Manager)
Arduino IDE Tools configuration for ESP32S3
!!! Install ESP32 core version 2.x, version 3.x won't work !!!
| Board | ESP32S3 Dev Module |
| Upload Speed | 921600 |
| USB Mode | Hardware CDC and JTAG |
| USB CDC On Boot | Disabled |
| USB Firmware MSC On Boot | Disabled |
| USB DFU On Boot | Disabled |
| Upload Mode | UART0 / Hardware CDC |
| CPU Frequency | 240MHz (WiFi) |
| Flash Mode | QIO 80MHz |
| Flash Size | 4MB (32Mb) |
| Partition Scheme | Huge APP (3MB No OTA/1MB SPIFFS) |
| Core Debug Level | Info |
| PSRAM | OPI PSRAM |
| Arduino Runs On | Core 1 |
| Events Run On | Core 1 |
| Erase All Flash Before Sketch Upload | Disabled |
| JTAG Adapter | Disabled |
Take a picture
Before showing you how to capture a picture with the EloquentEsp32Cam library, I want to refresh you how you may be accustomised. This code is taken from one of the many examples you can easily find online.
How it used to be
#include "esp_camera.h"
#include "soc/soc.h"          // Disable brownour problems
#include "soc/rtc_cntl_reg.h" // Disable brownour problems

// OV2640 camera module pins (CAMERA_MODEL_AI_THINKER)
#define PWDN_GPIO_NUM 32
#define RESET_GPIO_NUM -1
#define XCLK_GPIO_NUM 0
#define SIOD_GPIO_NUM 26
#define SIOC_GPIO_NUM 27
#define Y9_GPIO_NUM 35
#define Y8_GPIO_NUM 34
#define Y7_GPIO_NUM 39
#define Y6_GPIO_NUM 36
#define Y5_GPIO_NUM 21
#define Y4_GPIO_NUM 19
#define Y3_GPIO_NUM 18
#define Y2_GPIO_NUM 5
#define VSYNC_GPIO_NUM 25
#define HREF_GPIO_NUM 23
#define PCLK_GPIO_NUM 22
#define FLASH_GPIO_NUM 4


void initCamera()
{
  // Turn-off the 'brownout detector'
  WRITE_PERI_REG(RTC_CNTL_BROWN_OUT_REG, 0);

  // OV2640 camera module
  camera_config_t config;
  config.ledc_channel = LEDC_CHANNEL_0;
  config.ledc_timer = LEDC_TIMER_0;
  config.pin_d0 = Y2_GPIO_NUM;
  config.pin_d1 = Y3_GPIO_NUM;
  config.pin_d2 = Y4_GPIO_NUM;
  config.pin_d3 = Y5_GPIO_NUM;
  config.pin_d4 = Y6_GPIO_NUM;
  config.pin_d5 = Y7_GPIO_NUM;
  config.pin_d6 = Y8_GPIO_NUM;
  config.pin_d7 = Y9_GPIO_NUM;
  config.pin_xclk = XCLK_GPIO_NUM;
  config.pin_pclk = PCLK_GPIO_NUM;
  config.pin_vsync = VSYNC_GPIO_NUM;
  config.pin_href = HREF_GPIO_NUM;
  config.pin_sscb_sda = SIOD_GPIO_NUM;
  config.pin_sscb_scl = SIOC_GPIO_NUM;
  config.pin_pwdn = PWDN_GPIO_NUM;
  config.pin_reset = RESET_GPIO_NUM;
  config.xclk_freq_hz = 20000000;
  config.pixel_format = PIXFORMAT_JPEG;

  if (psramFound())
  {
    config.frame_size = FRAMESIZE_UXGA;
    config.jpeg_quality = 10;
    config.fb_count = 2;
  }
  else
  {
    config.frame_size = FRAMESIZE_SVGA;
    config.jpeg_quality = 12;
    config.fb_count = 1;
  }
  // Camera init
  esp_err_t err = esp_camera_init(&config);
  if (err != ESP_OK)
  {
    Serial.printf("Camera init failed with error 0x%x", err);
    ESP.restart();
  }
}

// Capture Photo
void capturePhoto(void)
{
  camera_fb_t *fb = NULL; // pointer
  fb = esp_camera_fb_get();
  if (!fb)
  {
    Serial.println("Camera capture failed");
    return;
  }

  Serial.println("Capture OK");

  // Hoops, memory leak!!!
}

void setup()
{
  Serial.begin(9600);
  initCamera();
}

void loop() {
  capturePhoto();
}You should recognize the usual structure:
- define pin constants
- assign pins
- configure sensor
- get frame
Pretty lengthy, right?
The code by itself is not difficult to understand, yet it is a whole bunch of lines that you have to copy-paste from project to project just to get started. Worst part is when you need to change the camera model: you have to look on internet for the correct pins definition and copy-paste one more piece of code.
There must be a better way, right?
How it is now
The following is what using the EloquentEsp32Cam library looks like.
Filename: Take_Picture.ino
/**
 * Get your first picture with ESP32
 *
 * Open the Serial Monitor and enter 'capture' (without quotes)
 * to capture a new image
 *
 * BE SURE TO SET "TOOLS > CORE DEBUG LEVEL = INFO"
 * to turn on debug messages
 */
#include <eloquent_esp32cam.h>

// all global objects (e.g. `camera`)
// are scoped under the `eloq` namespace
using eloq::camera;


/**
 *
 */
void setup() {
    delay(3000);
    Serial.begin(115200);
    Serial.println("___GET YOUR FIRST PICTURE___");

    // camera settings
    // replace with your own model!
    // supported models:
    // - aithinker
    // - m5
    // - m5_wide
    // - m5_timer
    // - eye
    // - wrover
    // - wroom_s3
    // - freenove_s3
    // - xiao
    // - ttgo_lcd
    // - simcam
    camera.pinout.aithinker();
    camera.brownout.disable();
    // supported resolutions
    // - yolo (96x96)
    // - qqvga
    // - qcif
    // - face (240x240)
    // - qvga
    // - cif
    // - hvga
    // - vga
    // - svga
    // - xga
    // - hd
    // - sxga
    // - uxga
    // - fhd
    // - qxga
    // ...
    camera.resolution.vga();
    // supported qualities:
    // - low
    // - high
    // - best
    camera.quality.high();

    // init camera
    while (!camera.begin().isOk())
        Serial.println(camera.exception.toString());

    Serial.println("Camera OK");
    Serial.println("Enter 'capture' (without quotes) to shot");
}

/**
 *
 */
void loop() {
    // await for Serial command
    if (!Serial.available())
        return;

    if (Serial.readStringUntil('\n') != "capture") {
        Serial.println("I only understand 'capture'");
        return;
    }

    // capture picture
    if (!camera.capture().isOk()) {
        Serial.println(camera.exception.toString());
        return;
    }

    // print image info
    Serial.printf(
        "JPEG size in bytes: %d. Width: %dpx. Height: %dpx.\n",
        camera.getSizeInBytes(),
        camera.resolution.getWidth(),
        camera.resolution.getHeight()
    );

    Serial.println("Enter 'capture' (without quotes) to shot");
}I'll strip all the comments and Serial code to show you the lines that really matter. So you can appreciate the compactness of the code.
// configure the camera
camera.pinout.aithinker();
camera.brownout.disable();
camera.resolution.vga();
camera.quality.high();

// init and capture
camera.begin().isOk();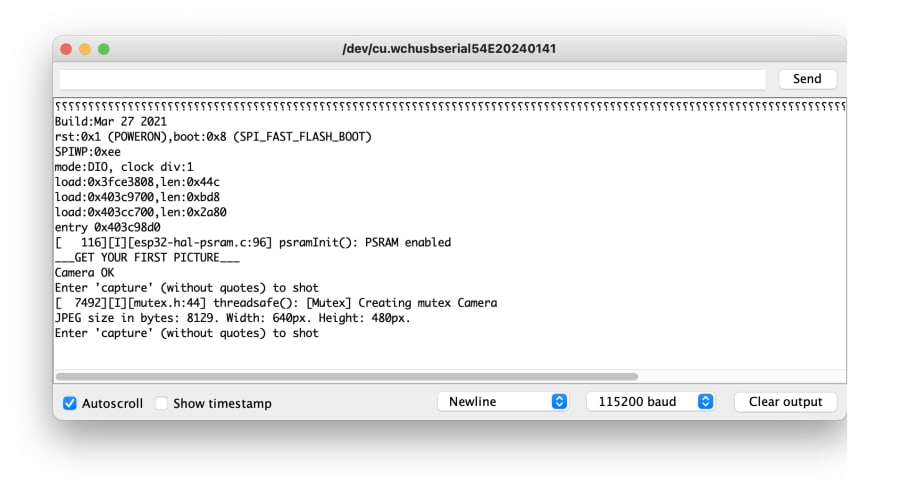
camera.capture().isOk();After you upload the sketch, open the Serial Monitor and follow the instructions. You should get something similar to the image below.
Most of the methods that can succeed or fail from the EloquentEsp32Cam library (like begin() and capture()) don't return a boolean. They instead return an exception object.
Why? you may ask...
Because it is a shame when something fails and you don't know why. The C style of notifying of an error is with integer status code. But then you have to search online what each status code means. Wouldn't it be much better if you got a text status code? That's what the exception object does for you.
And this is why you have to test if something went wrong or not with the .isOk() construct.
// bad, don't do this!
if (camera.begin()) {}

// good, do this!
if (camera.begin().isOk()) {}

// in case of error, print a human readable description
Serial.println(camera.exception.toString());Sensor configuration
The ESP32 camera sensor is pretty powerful. It has a lot of configurations available that you can tweak to get perfect pictures in a wide range of scenarios. I recommend you take some time to experiment with its settings and choose the ones that work best for you before you start developing a new project.
Load the default CameraWebServer example and find your optimal configuration. Take note of the values: we will convert them to code in the next section.
Change sensor settings
To configure the sensor you access the camera.sensor object. The API is really intuitive and follows a standardized syntax.
// values that range from -2 to +2 (brightness and saturation)
// follow this syntax
camera.sensor.lowestSaturation();
camera.sensor.lowSaturation();
camera.sensor.defaultSaturation();
camera.sensor.highSaturation();
camera.sensor.highestSaturation();
camera.sensor.setSaturation(int value); // from -2 to +2

camera.sensor.lowestBrightness();
camera.sensor.lowBrightness();
camera.sensor.defaultBrightness();
camera.sensor.highBrightness();
camera.sensor.highestBrightness();
camera.sensor.setBrightness(int value); // from -2 to +2Boolean settings follow the enable/disable API.
camera.sensor.enableAutomaticWhiteBalance();
camera.sensor.disableAutomaticWhiteBalance();
camera.sensor.setAutomaticWhiteBalance(true|false);

camera.sensor.enableGainControl();
camera.sensor.disableGainControl();
camera.sensor.setGainControl(true|false);Finally, there are specific settings which don't follow any scheme.
camera.sensor.noSpecialEffect();
camera.sensor.negative();
camera.sensor.grayscale();
camera.sensor.sepia();
camera.sensor.redTint();
camera.sensor.greenTint();
camera.sensor.blueTint();
camera.sensor.hmirror();
camera.sensor.vmirror();Take a look at the source code of the sensor object to see the full list of available methods.
MJPEG streaming
When you're first starting with the ESP32 camera, you probably want to see its live video streaming.
The following sketch starts an HTTP server that only streams the video from the camera. Consider it a leaner clone of the default CameraWebServer example.
Filename: MJPEG_Stream.ino
/**
 * View camera MJPEG stream
 *
 * Start an HTTP server to access the live video feed
 * of the camera from the browser.
 *
 * Endpoints are:
 *  - / -> displays the raw MJPEG stream
 *  - /jpeg -> captures a still image
 *
 * BE SURE TO SET "TOOLS > CORE DEBUG LEVEL = INFO"
 * to turn on debug messages
 */

// if you define WIFI_SSID and WIFI_PASS before importing the library,
// you can call connect() instead of connect(ssid, pass)
//
// If you set HOSTNAME and your router supports mDNS, you can access
// the camera at http://{HOSTNAME}.local

#define WIFI_SSID "SSID"
#define WIFI_PASS "PASSWORD"
#define HOSTNAME  "esp32cam"

#include <eloquent_esp32cam.h>
#include <eloquent_esp32cam/viz/mjpeg.h>

using namespace eloq;
using namespace eloq::viz;


/**
 *
 */
void setup() {
    delay(3000);
    Serial.begin(115200);
    Serial.println("___MJPEG STREAM SERVER___");

    // camera settings
    // replace with your own model!
    camera.pinout.aithinker();
    camera.brownout.disable();
    camera.resolution.vga();
    camera.quality.high();

    // init camera
    while (!camera.begin().isOk())
        Serial.println(camera.exception.toString());

    // connect to WiFi
    while (!wifi.connect().isOk())
        Serial.println(wifi.exception.toString());

    // start mjpeg http server
    while (!mjpeg.begin().isOk())
        Serial.println(mjpeg.exception.toString());

    Serial.println("Camera OK");
    Serial.println("WiFi OK");
    Serial.println("MjpegStream OK");
    Serial.println(mjpeg.address());
}


void loop() {
    // HTTP server runs in a task, no need to do anything here
}From a high-level perspective, there's not much to tell about this sketch:
- it configures the camera
- it connects to the WiFi network
- it starts the MJPEG HTTP server
The few lines of code that we added are listed below.
// connect to WiFi
while (!wifi.connect().isOk())
    Serial.println(wifi.exception.toString());

// start mjpeg http server
while (!mjpeg.begin().isOk())
    Serial.println(mjpeg.exception.toString());

// get IP address of the board
Serial.println(mjpeg.address());Open the Serial Monitor and you will read something similar to the screenshot below.
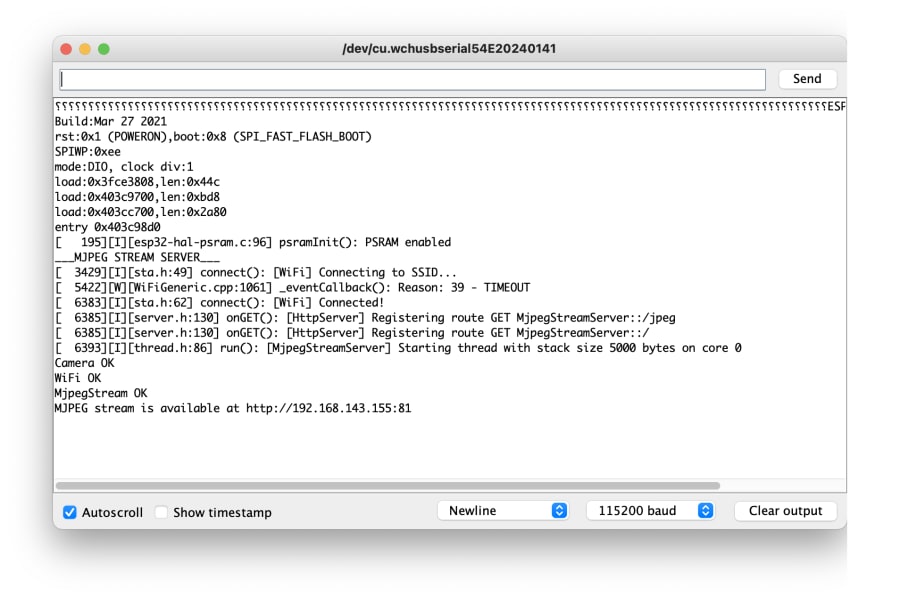
http://esp32cam.local:81Be sure you are connected to the same network as the ESP32!
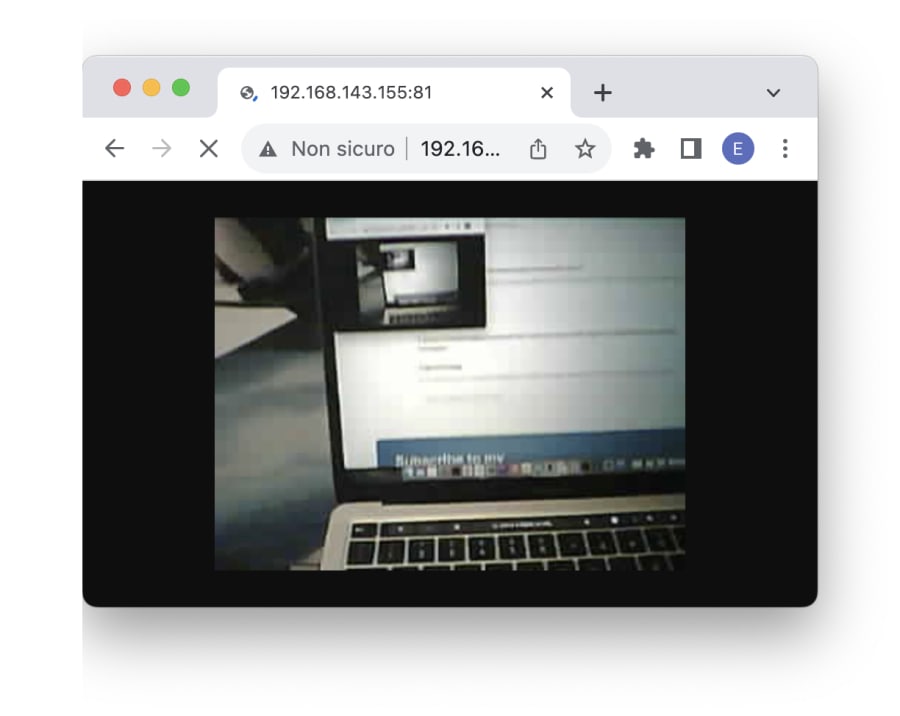
If you get a blank page, try to replace the above address with the IP address that get's printed in the Serial Monitor. It will look like
http://192.X.Y.Z:81If you set a resolution higher than QVGA (320 x 240), be sure your WiFi signal is strong, otherwise the feed will look laggish.
Still image
As an added feature, this sketch will allow you to get still image captures from the camera at the following endpoint:
http://esp32cam.local:81/jpegStream controls
You can play/pause/stop the MJPEG stream at your will. While paused, the stream will freeze and will automatically restart when you call play().
If you stop it, instead, it will drop the connection altogether and a full page reload will be necessary to restart the stream (after you call play()).
Filename: MJPEG_Controls.ino
/**
 * Play/Pause/Stop MJPEG stream
 *
 * BE SURE TO SET "TOOLS > CORE DEBUG LEVEL = INFO"
 * to turn on debug messages
 */

// if you define WIFI_SSID and WIFI_PASS before importing the library,
// you can call connect() instead of connect(ssid, pass)
//
// If you set HOSTNAME and your router supports mDNS, you can access
// the camera at http://{HOSTNAME}.local

#define WIFI_SSID "SSID"
#define WIFI_PASS "PASSWORD"
#define HOSTNAME  "esp32cam"

#include <eloquent_esp32cam.h>
#include <eloquent_esp32cam/viz/mjpeg.h>

using namespace eloq;
using namespace eloq::viz;


/**
 *
 */
void setup() {
    delay(3000);
    Serial.begin(115200);
    Serial.println("___MJPEG STREAM SERVER CONTROLS___");

    // camera settings
    // replace with your own model!
    camera.pinout.aithinker();
    camera.brownout.disable();
    camera.resolution.qvga();
    camera.quality.high();

    // init camera
    while (!camera.begin().isOk())
        Serial.println(camera.exception.toString());

    // connect to WiFi
    while (!wifi.connect().isOk())
        Serial.println(wifi.exception.toString());

    // start mjpeg http server
    while (!mjpeg.begin().isOk())
        Serial.println(mjpeg.exception.toString());

    Serial.println("Camera OK");
    Serial.println("WiFi OK");
    Serial.println("MjpegStream OK");
    Serial.println(mjpeg.address());
    Serial.println("Send play/pause/stop to control the server");
}

/**
 *
 */
void loop() {
  if (!Serial.available())
    return;

  String command = Serial.readStringUntil('\n');

  if (command.startsWith("play"))
    mjpeg.play();
  else if (command.startsWith("pause"))
    mjpeg.pause();
  else if (command.startsWith("stop"))
    mjpeg.stop();
  else
    Serial.println("Unknown command");
}