The new ESP32S3 chip has a lot more processing power than the old ESP32. This makes it suitable for many tasks that would have taken too much time in the past to implement in a realtime application.
One of these task is face detection. With the ESP32S3 chip, you can run accurate face detection in 80ms!
The official ESP-IDF API is not too difficult to use, but I made it even easier with the EloquentEsp32Cam library. In this page, I'll show you how easy it can be to run fast and accurate face detection on your ESP32S3 camera board.
Hardware requirements
This project only works with ESP32S3 boards.
Software requirements
EloquentEsp32Cam >= 2.2
Arduino IDE Tools configuration for ESP32S3
!!! Install ESP32 core version 2.x, version 3.x won't work !!!
| Board | ESP32S3 Dev Module |
| Upload Speed | 921600 |
| USB Mode | Hardware CDC and JTAG |
| USB CDC On Boot | Disabled |
| USB Firmware MSC On Boot | Disabled |
| USB DFU On Boot | Disabled |
| Upload Mode | UART0 / Hardware CDC |
| CPU Frequency | 240MHz (WiFi) |
| Flash Mode | QIO 80MHz |
| Flash Size | 4MB (32Mb) |
| Partition Scheme | Huge APP (3MB No OTA/1MB SPIFFS) |
| Core Debug Level | Info |
| PSRAM | OPI PSRAM |
| Arduino Runs On | Core 1 |
| Events Run On | Core 1 |
| Erase All Flash Before Sketch Upload | Disabled |
| JTAG Adapter | Disabled |
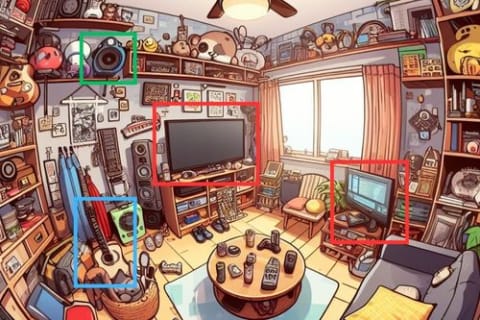
This is a demo of what we will achieve by the end of this tutorial.
Face detection quickstart
Filename: Face_Detection.ino
/**
 * Face detection
 * ONLY WORKS ON ESP32S3
 *
 * BE SURE TO SET "TOOLS > CORE DEBUG LEVEL = INFO"
 * to turn on debug messages
 */
#include <eloquent_esp32cam.h>
#include <eloquent_esp32cam/face/detection.h>

using eloq::camera;
using eloq::face_t;
using eloq::face::detection;


/**
 *
 */
void setup() {
    delay(3000);
    Serial.begin(115200);
    Serial.println("___FACE DETECTION___");

    // camera settings
    // !!!!REPLACE WITH YOUR OWN MODEL!!!!
    camera.pinout.freenove_s3(); // e.g. xiao(), lilygo_tcamera_s3(), ...
    camera.brownout.disable();
    // face detection only works at 240x240
    camera.resolution.face();
    camera.quality.high();

    // you can choose fast detection (50ms)
    detection.fast();
    // or accurate detection (80ms)
    detection.accurate();

    // you can set a custom confidence score
    // to consider a face valid
    // (in range 0 - 1, default is 0.5)
    detection.confidence(0.7);

    // init camera
    while (!camera.begin().isOk())
        Serial.println(camera.exception.toString());

    Serial.println("Camera OK");
    Serial.println("Awaiting for face...");
}

/**
 *
 */
void loop() {
    // capture picture
    if (!camera.capture().isOk()) {
        Serial.println(camera.exception.toString());
        return;
    }

    // run detection
    if (!detection.run().isOk()) {
        Serial.println(detection.exception.toString());
        return;
    }

    // if face is not found, abort
    if (detection.notFound())
      return;

    Serial.printf(
        "Face(s) detected in %dms!\n",
        detection.benchmark.millis()
    );

    // you can access the first detected face
    // at detection.first
    Serial.printf(
      " > face #1 located at (%d, %d)\n"
      "   proba is %.2f\n",
      detection.first.x,
      detection.first.y,
      detection.first.score
    );

    // if you expect multiple faces, you use forEach
    if (detection.count() > 1) {
      detection.forEach([](int i, face_t face) {
          Serial.printf(
              " > face #%d located at (%d, %d)\n",
              i + 1,
              face.x,
              face.y
          );

          // if you enabled accurate detection
          // you have access to the keypoints
          if (face.hasKeypoints()) {
              Serial.printf(
                "   > left  eye   at (%d, %d)\n"
                "   > right eye   at (%d, %d)\n"
                "   > nose        at (%d, %d)\n"
                "   > left mouth  at (%d, %d)\n"
                "   > right mouth at (%d, %d)\n",
                face.leftEye.x,
                face.leftEye.y,
                face.rightEye.x,
                face.rightEye.y,
                face.nose.x,
                face.nose.y,
                face.leftMouth.x,
                face.leftMouth.y,
                face.rightMouth.x,
                face.rightMouth.y
              );
          }

      });
    }
}This entire code is ~100 lines, most of which comments and prints.
The most important parts are listed below and explained in more detail.
Frame resolution
At the current state, face detection only works on frames of 240x240!
camera.resolution.face();Detection accuracy vs speed
// you can choose fast detection (50ms)
detection.fast();
// or accurate detection (80ms)
detection.accurate();There are two methods of detection:
- one pass: there's a single classifier that detects the faces. It is fast, but may get some faces wrong or miss actual faces
- two passes: the output of the one pass classifier is fed as input to a second classifier that refines the results
Of course, the two passes process is more accurate but takes some more time. It is up to you to decide which one best suits your project.
Run face detection
Running the face detection algorithm only takes a single line.
if (!detection.run().isOk()) {}The detection in itself will never actually fail. You can get a failure under 2 circumstances:
- you forgot to set resolution to 240x240
- the JPEG frame cannot be converted to RGB888 format (memory issues probably)
In both cases, you will see a clear error message printed in the Serial monitor.
Check face existance
If the above line returns true, it doesn't mean that there is a face in the frame! You can check if at least one face has been detected by calling
if (detection.found()) {}
// or, on the contrary
if (detection.notFound()) {}Face coordinates and keypoints
Once a face (or more) is detected, you can get access to its coordinates (x, y, width, height). If you turned on accurate detection, you also have access to the coordinates of leftEye, rightEye, nose, leftMouth, rightMouth.
If you only expect a single face to be detected, you can access it at detection.first.
Serial.printf(
  " > face #1 located at (%d, %d)\n"
  "   proba is %.2f\n",
  detection.first.x,
  detection.first.y,
  // score is the probability of detection
  detection.first.score
);In case multiple faces are detected, you can iterate over them with the forEach function.
detection.forEach([](int i, face_t face) {
    Serial.printf(
        " > face #%d located at (%d, %d)\n",
        i + 1,
        face.x,
        face.y
    );
});Event-Driven face detection
In the Quickstart sketch, we saw how easy and linear it is to run face detection; it only requires a few lines of code. Nevertheless, the loop() function is pretty lengthy now because it has to continuously check if one or more faces are present in the frame.
In this section, I'm going to show you how to move all the logic into the setup() function instead. We will exploit a style of programming called event driven (or reactive). Event driven programming consists in registering a listener function that will run when an event of interest happens. In our case, the event of interest is one or more faces being detected.
Why is this useful?
As I said, because it allows for leaner loop() code, where you can focus on running other tasks that need to occur in parallel to face detection. Often, event listeners also help to isolate specific functionalities (face detection handling) into their own routines, visually de-cluttering other tasks' code.
Here's the updated sketch.
This source code is only available to paying users.
What else you will get:
- Advanced motion detection
- Face detection
- Advanced Edge Impulse FOMO
- Edge Impulse FOMO Pan-Tilt
- Self-driving car
The configuration part is exactly the same as before. The new entry is the daemon object which does 2 things:
- accepts event listeners to be run on events of interest
- runs the face detection code in background
To register the callback to run when a single face is detected, we use
detection.daemon.onFace([](face_t face) {});To register the callback to run when multiple faces are detected, we use
detection.daemon.onMultipleFaces([](int face_index, face_t face) {});As easy as that!
Now you could even leave the loop() empty and you still will see the Face detected message printed on the Serial Monitor when a face enters the camera viewport.
Face detection to MQTT
In your specific project, detecting a face may only be the first step in a larger system.
Maybe you want to log how many faces were detected in a database, or get a notification on your phone, or an email... whatever. There are many ways to accomplish this goal. One of the most popular in the maker community is using the MQTT protocol as a mean of systems communication.
The EloquentEsp32Cam has a first party integration for MQTT.
In the following sketch, you will have to replace the test.mosquitto.org broker with your own and (if required) add proper authentication. Beside that, the sketch will work out of the box.
Software requirements
EloquentEsp32Cam >= 2.2PubSubClient >= 2.8
This source code is only available to paying users.
What else you will get:
- Advanced motion detection
- Face detection
- Advanced Edge Impulse FOMO
- Edge Impulse FOMO Pan-Tilt
- Self-driving car
What is the payload that will be uploaded? It is a JSON description of all the faces found in the frame.
[{"x": 0, "y": 0, "w": 100, "h": 100, "score": 0.8}, ...]Face detection streaming
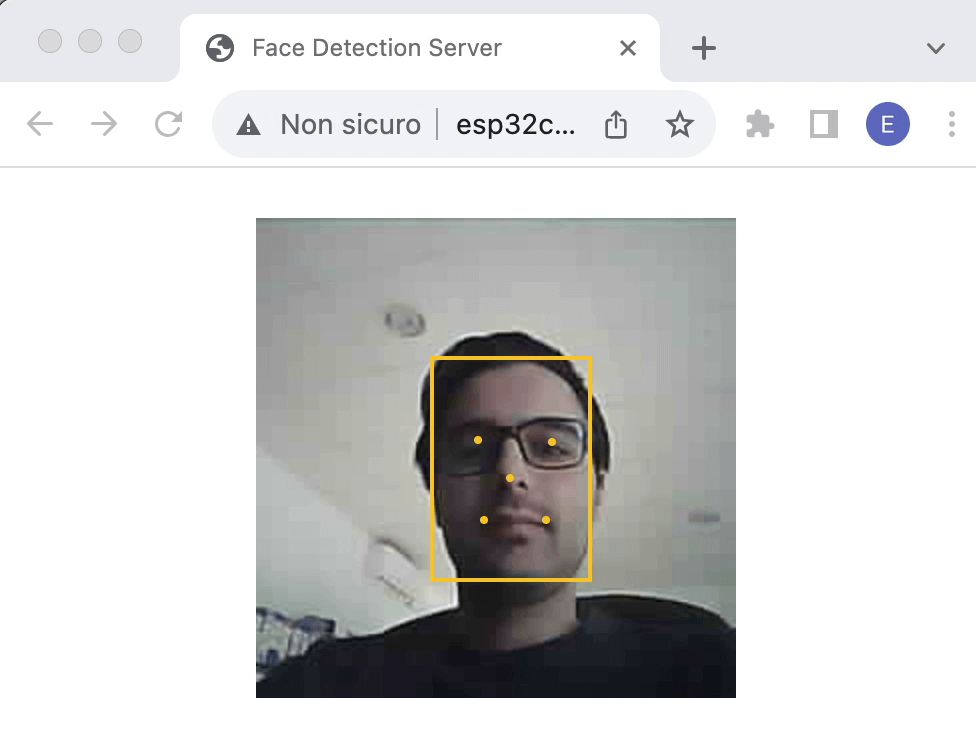
So far, we were only able to debug face detection in the Serial Monitor. It would be much better if we could visually debug it by seeing the realtime streaming video from the camera at the same time.
Face detection streaming is implemented in the default CameraWebServer example from the Arduino IDE, but it also has a lot more options that may distract you. If you prefer a cleaner interface, you can run the sketch below.
This source code is only available to paying users.
What else you will get:
- Advanced motion detection
- Face detection
- Advanced Edge Impulse FOMO
- Edge Impulse FOMO Pan-Tilt
- Self-driving car
To view the camera stream in a web browser, we need to connect to a WiFi network. Replace WIFI_SSID, WIFI_PASS and HOSTNAME with your own values and be sure your PC/smartphone is connected to the same network!
Open the Serial Monitor and take note of the IP address of your board. If your router supports mDNS (most do), you can open the stream at http://esp32cam.local, otherwise you will need to use the IP address.
This is a short demo of what the result will look like.
As opposed as a few other tutorials that you can find online, the landmarks detection is happening on the ESP32 itself, not in the browser!